
This Devil 's eye is a basic pattern for making a flower,
Easy to knot , for The Eye you just knot Double half hitch bar in different directions
and for the bracelet line you can use any pattern you like, for this bracelet I use Spiral half hitch


Materials : Cords ( waxed cord no.3 /1 mm. thick)

- 3 Brown cords (Main cords for bracelet structure), A 120 cm., B 70 cm., C 60 cm.
- 2 Yellow cords, 60 cm., 60 cm.
- 1 White cords, 50 cm.
- 2 Pink cord, 40 cm., 30 cm.
- Beads for decoration


Step1. Fold B 70cm. and C 60 cm. cord in a half. Place B over the C and bring both end of B heading down passing the folded area, and full them firmly
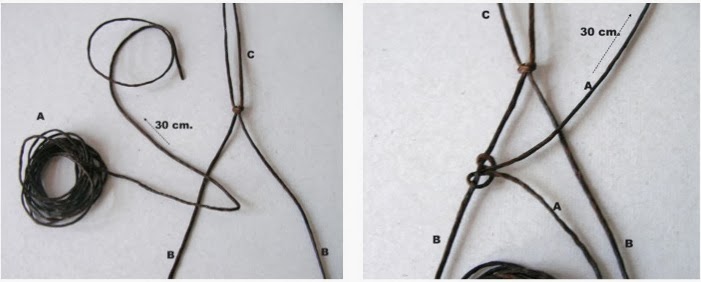
1 st row ;
- Fold A cord , top side will be 30 cm. long,
- Do the same Step1 Place A over B(left side) and bring both end of B heading down passing the folded area, and full them firmly close to C knot.
 |
|

- Add 1 yellow cord by Folding it and do the same Step1 By placing yellow cord around A.


- Tie the double half hitch knot to the left.
- A will be the working cord, B will be the holding cord,Make sure that each knot is closed to the wrapping part. Now you finish the 1 st row


2nd row ;
- Tie the double half hitch knot to the right. A will be the working cord, B will be the holding cord

- Tie the double half hitch knot to the right. 2 Yellow cords will be the working cord, A will be the holding cord
- Tie the double half hitch knot to the right. A will be the working cord, B will be the holding cord
- Now you finish the 2nd row

3rd row ;
- Do the same method, but add second yellow cord to the A between 2 first yellow cord.

- Continue the same method (Tie the double half hitch knot to the right) to finish the 3 rd row.
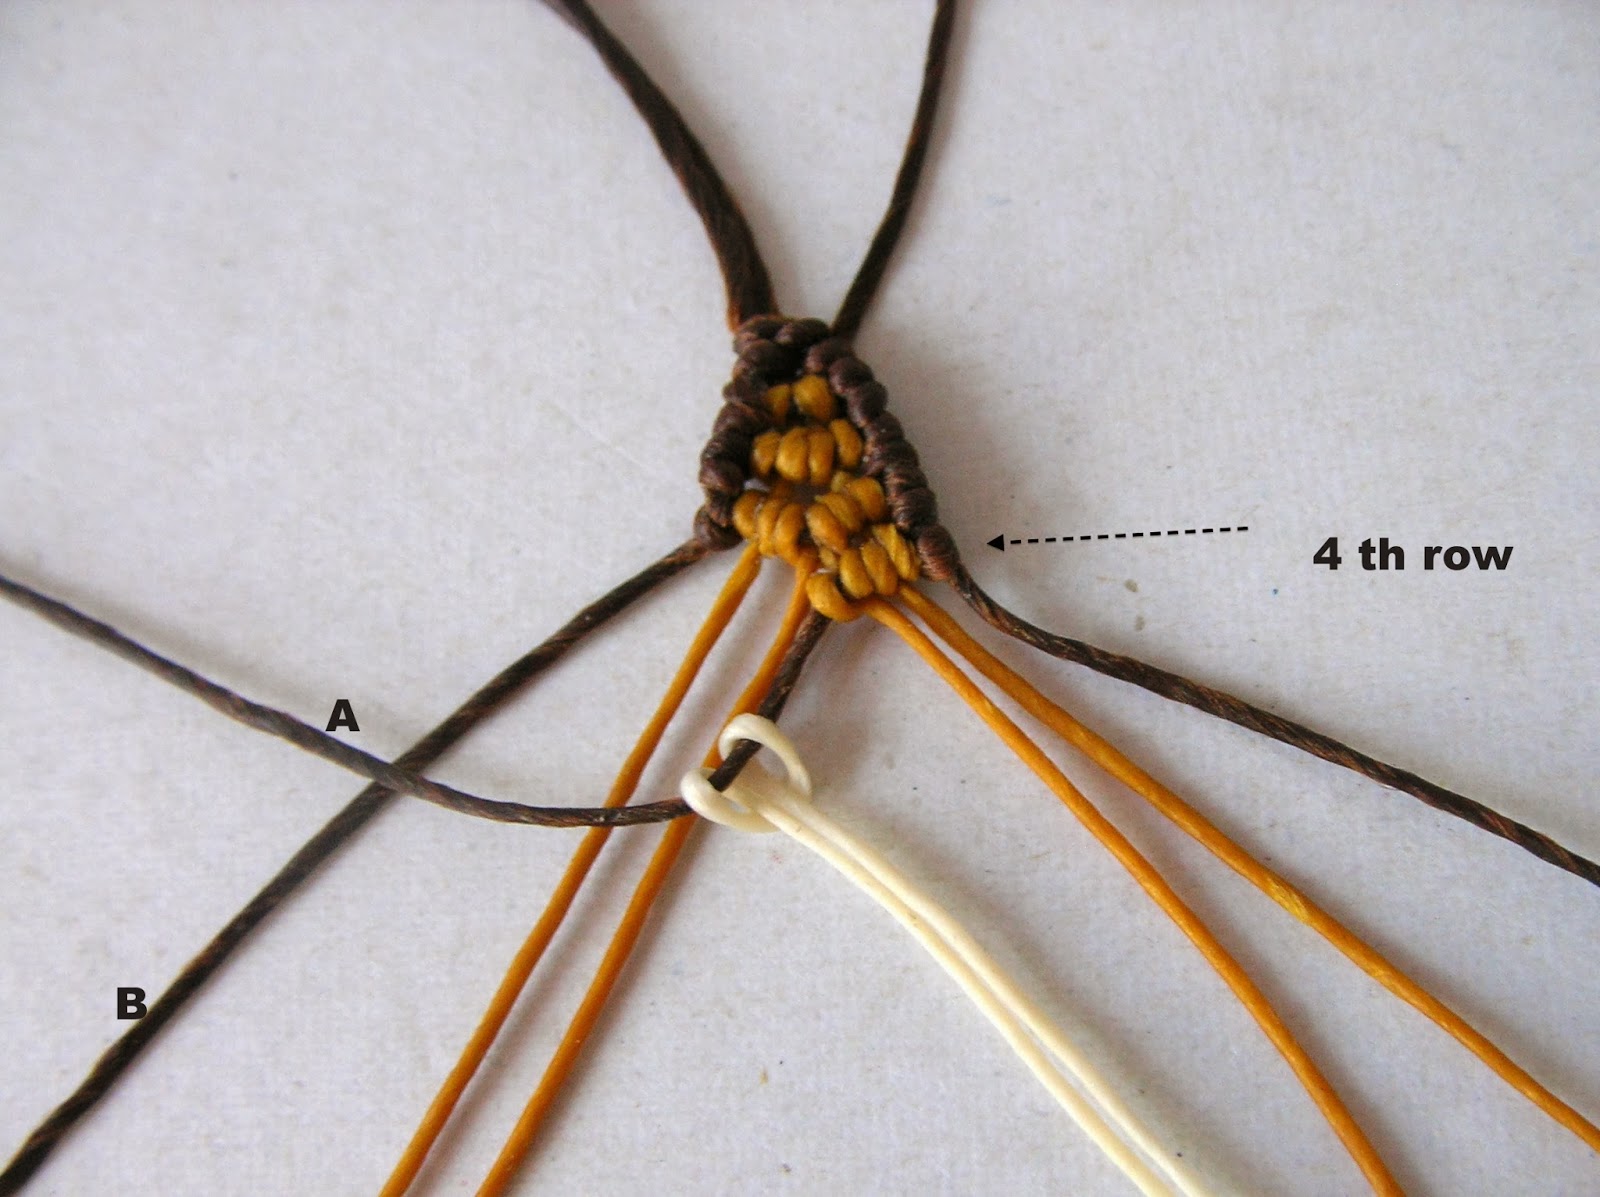
- Do the same method, but add white cord to the A in the middle between 4 yellow cords.
- Continue the same method (Tie the double half hitch knot to the left)

5th row ;
- Continue the same method (Tie the double half hitch knot to the right)

6th row ;
- Do the same method, but add first pink cord to the A in the middle between 2 white cords.
- Continue the same method (Tie the double half hitch knot to the left)

7th row ;
- Continue the same method (Tie the double half hitch knot to the right)

8th row ;
- Do the same method, but add second pink cord to the A in the middle between 2 pink cords.
- Continue the same method (Tie the double half hitch knot to the left)

- Continue the same method (Tie the double half hitch knot to the right)

- SKIP to tie knot one pink cord in the middle
- When finish the row, put skipped pink cord to upper work, we will never tie them again.


13 th row ; SKIP to tie the last pink cord in the middle.

14 th row ; SKIP to tie the white cord in the middle.

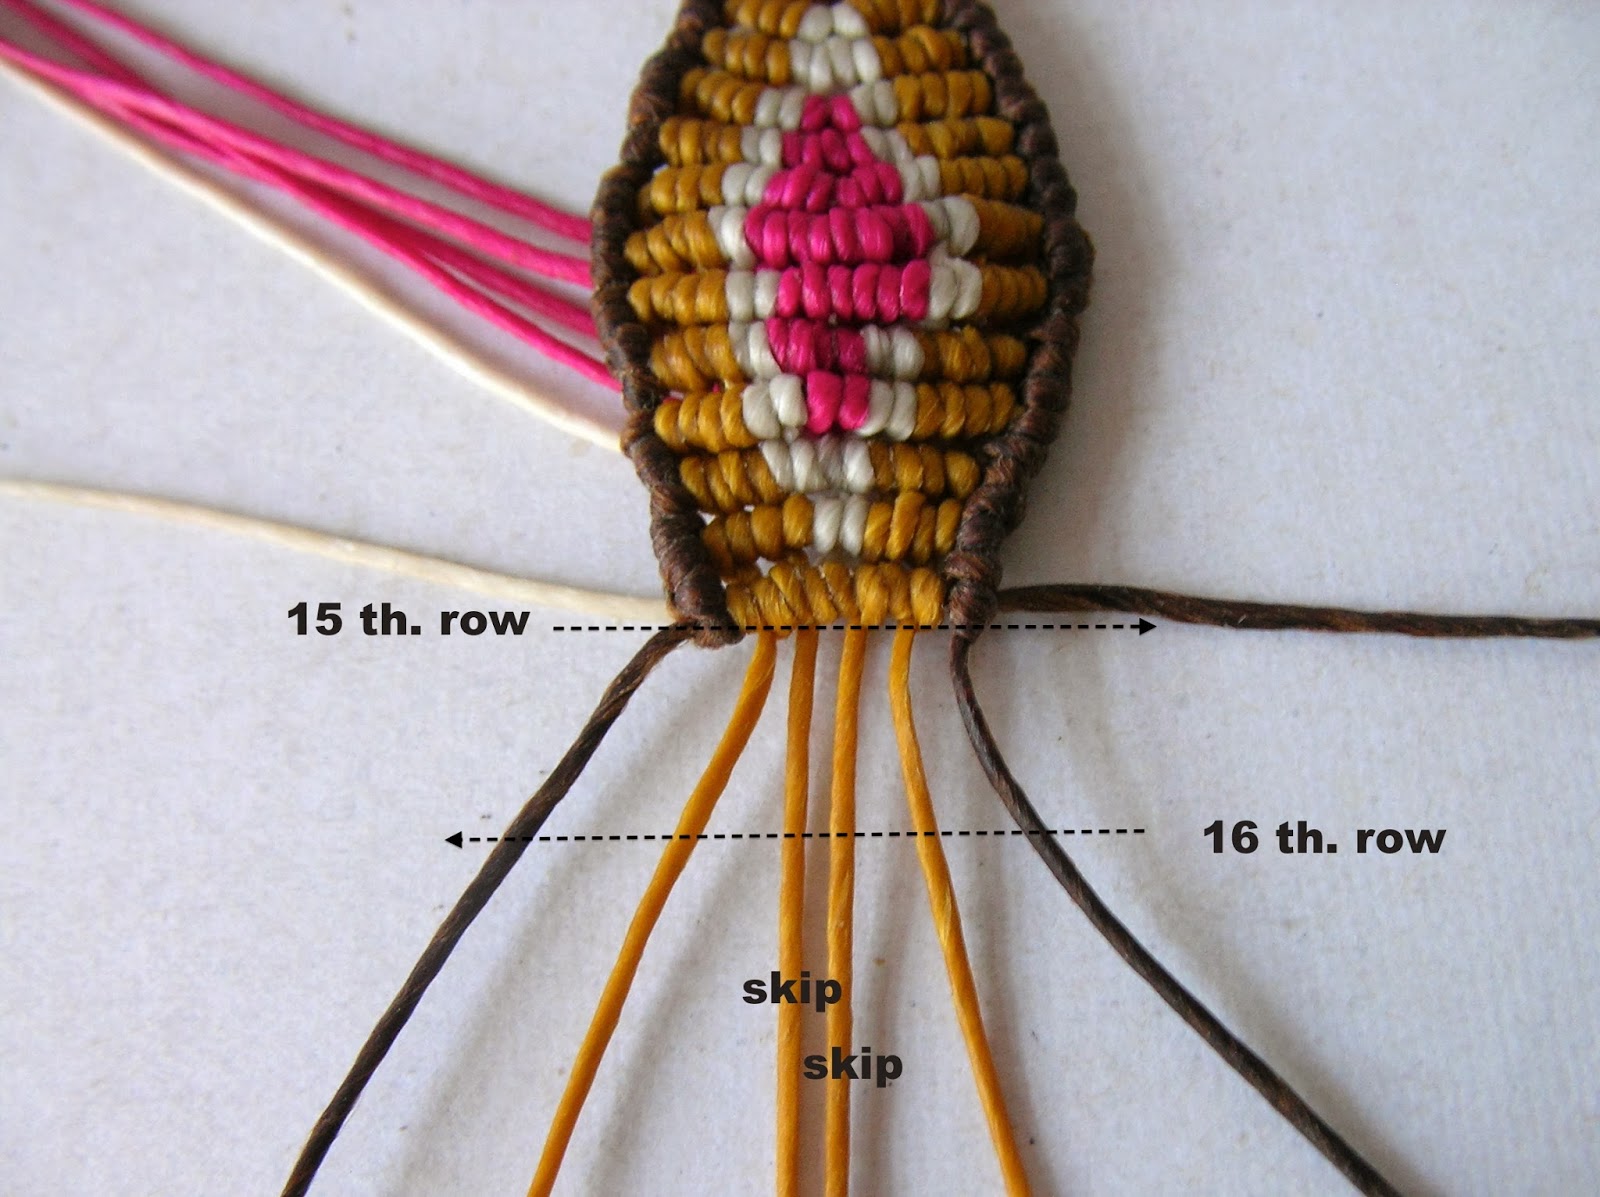


- Then knot the last double haft hitch, B1 will be a working cord, B2 will be a holding cord.
- the rest of B2 , B1 , A will be a bracelet line.

- Cut and Burn the skipped cords (see how to burn waxed cord here)

- Then make bracelet lines by your preferred pattern.
If you have some questions please left it in comment, I will try to answer as soon as possible
The best tutorial ever!!!Thank you!
ReplyDeleteThis post is worthy of appreciation, looking forward to more exciting! swarovski london
ReplyDeleteThank you for taking the time to upload these tutorials, they are really geat! I just have a hard time trying tu burn the cord at the knots, du you have any advice? Greetings from Germany, Leonie
ReplyDeleteHi Leonie,
Deleteif the problem is because of less wax, place some wax to the end of the cord by diking it in to melted wax such as in burn candle, leave it cold and hard then burn it again.
Tips is you have to press the melt cord immediately after you blow the fire, before wax getting harder again, this process may hurt your finger a little bit, just do it slowly
It is really innovative and unique tips.Now i am going to try it.Thank you for sharing this site.
ReplyDeleteZarah from Edubilla
If you are curious about macrame and the history of knotted art, just read on! macrame patterns | macrame bracelet
ReplyDeleteAhhh this looks difficult. . .
ReplyDeleteGreat! Thank you very much. Awesome tutorial.
ReplyDeleteAmazing post! If you're interested in authentic spiritual products and gemstone jewelry, check out Brajbhoomi – they have a beautiful collection of natural stones and handmade items.
ReplyDelete